
Start a Magento VM
Walk the create-environment wizard from "+ Create Store" to Active status. About 30 minutes in the background.
Start your first Magento environment from the Hub. The create-environment wizard takes a few minutes of input; the actual provision runs ~30 minutes in the background. For a trial environment you don't need anything else — StoreFrame's infrastructure handles the VM. For a paid Project you'll first register a cloud-provider API token (see pick your provider).
Don't have an account yet? Create your account first →
Open the wizard
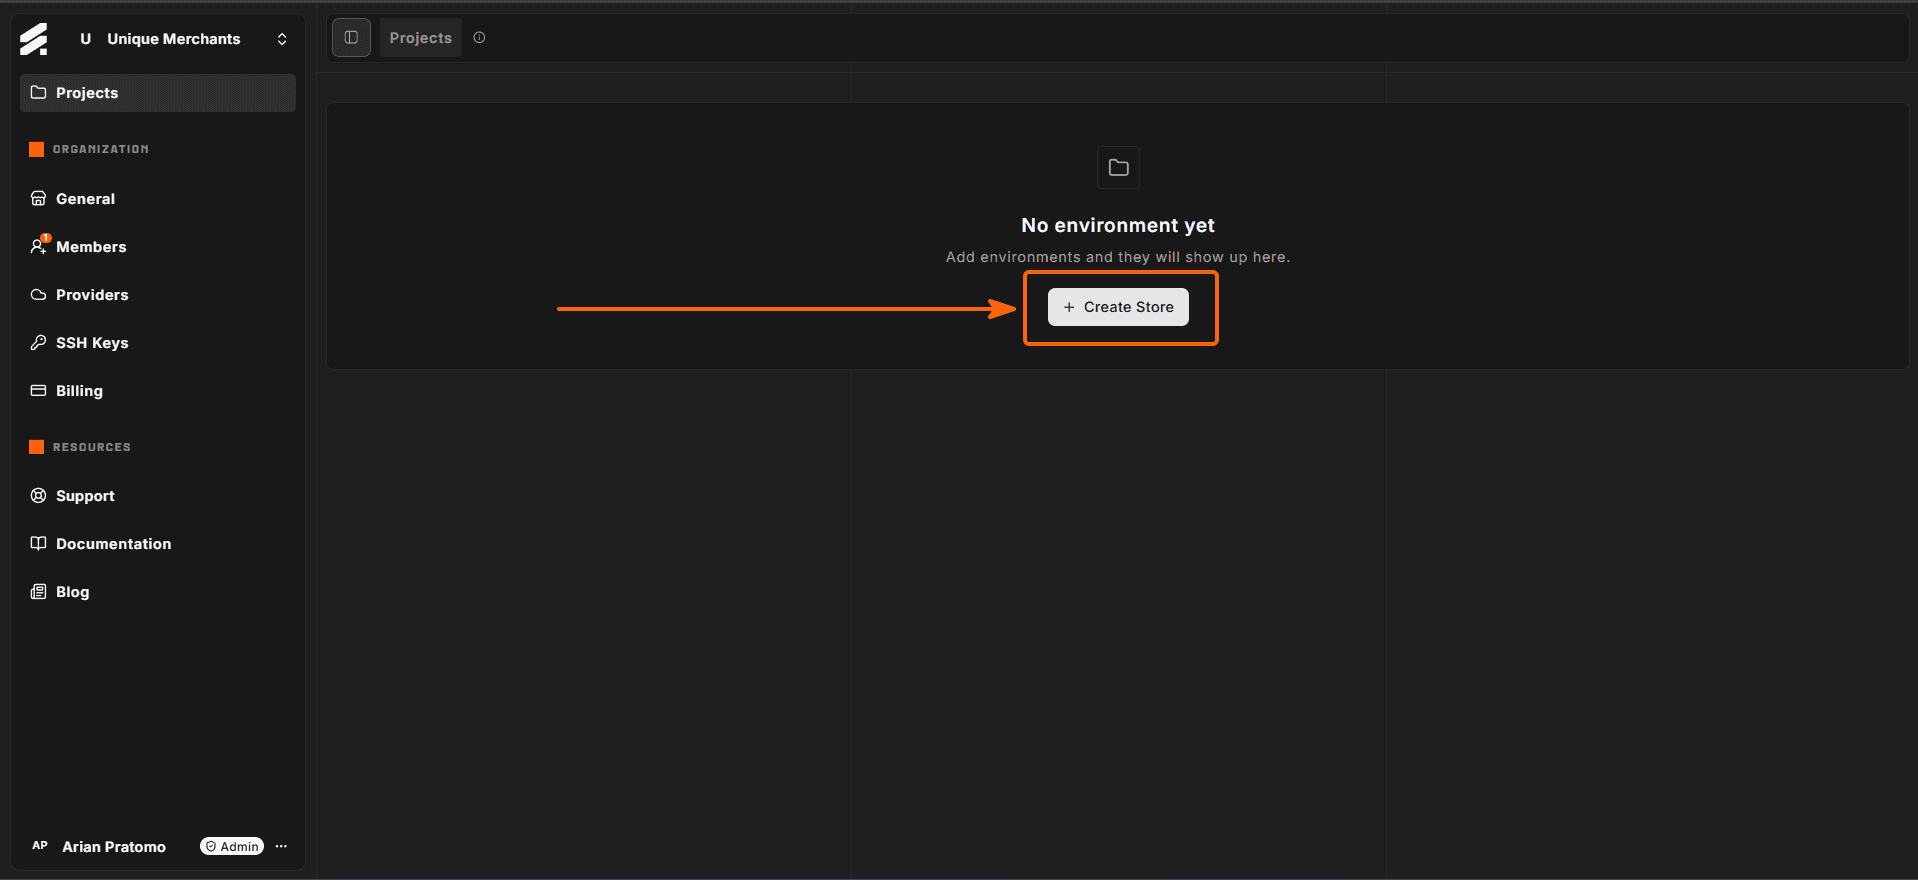
In the Hub, click "+ Create Store" from the Project list.
What the wizard asks for
The wizard is a single scrolling form with five sections. Work through them top to bottom, then click Start provisioning at the bottom of the page.
Platform
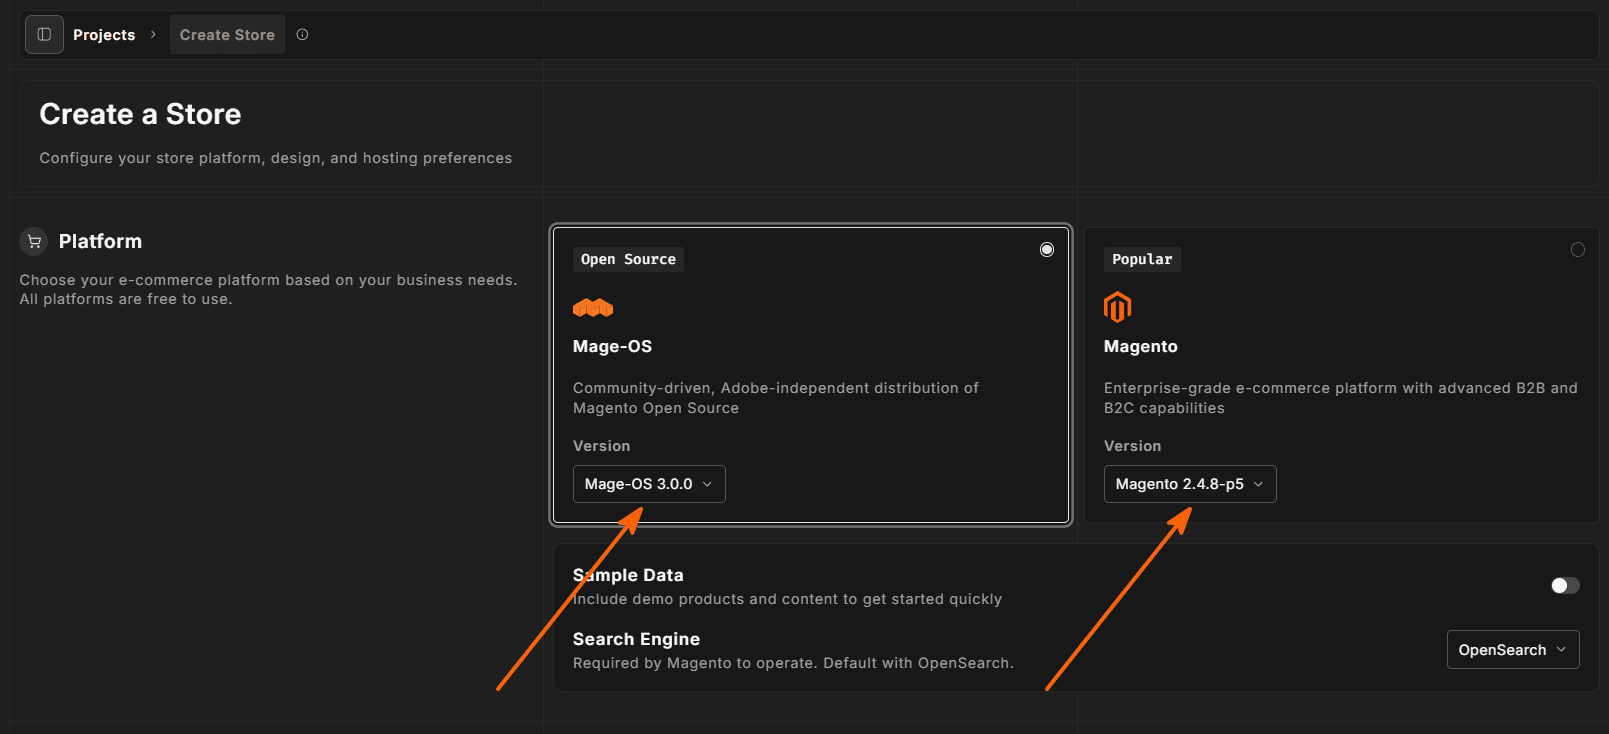
Choose your e-commerce platform and version. Magento is currently the only option. You can also toggle Sample Data here to include demo products — useful for exploring the admin before you connect your own catalog.
Provider
Select the environment type and cloud account:
- Trial StoreFrame provisions the VM on its own infrastructure. No credit card required. The trial lasts 3 days; at the end it is destroyed automatically unless you convert it to a paid Project. One trial per organization, lifetime.
- Project (BYOK) StoreFrame spins up the VM under your cloud account. Billed at €50/month per Project slot. Requires a provider API key you registered in step 1.
For your first environment, pick Trial unless you want to skip straight to a paid Project.
After choosing the environment type, pick the region closest to your customers. Region affects latency, not pricing.
Then choose a server size. Defaults are tuned for typical Magento traffic. You can resize later from the environment settings.

Theme
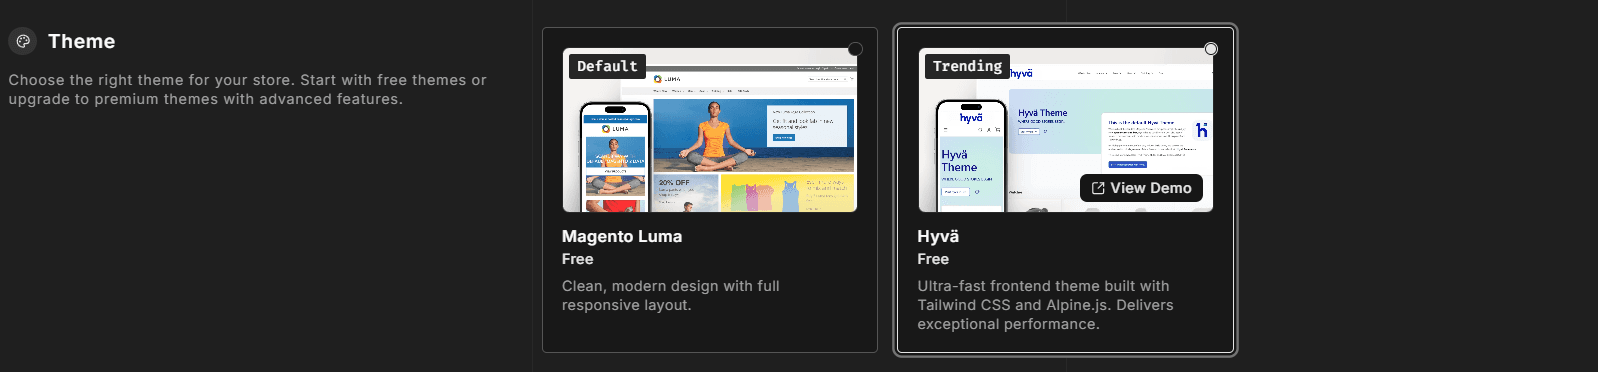
Pick a storefront theme. Free themes are available immediately. Premium themes carry a one-time license fee collected at subscription checkout.
Store details
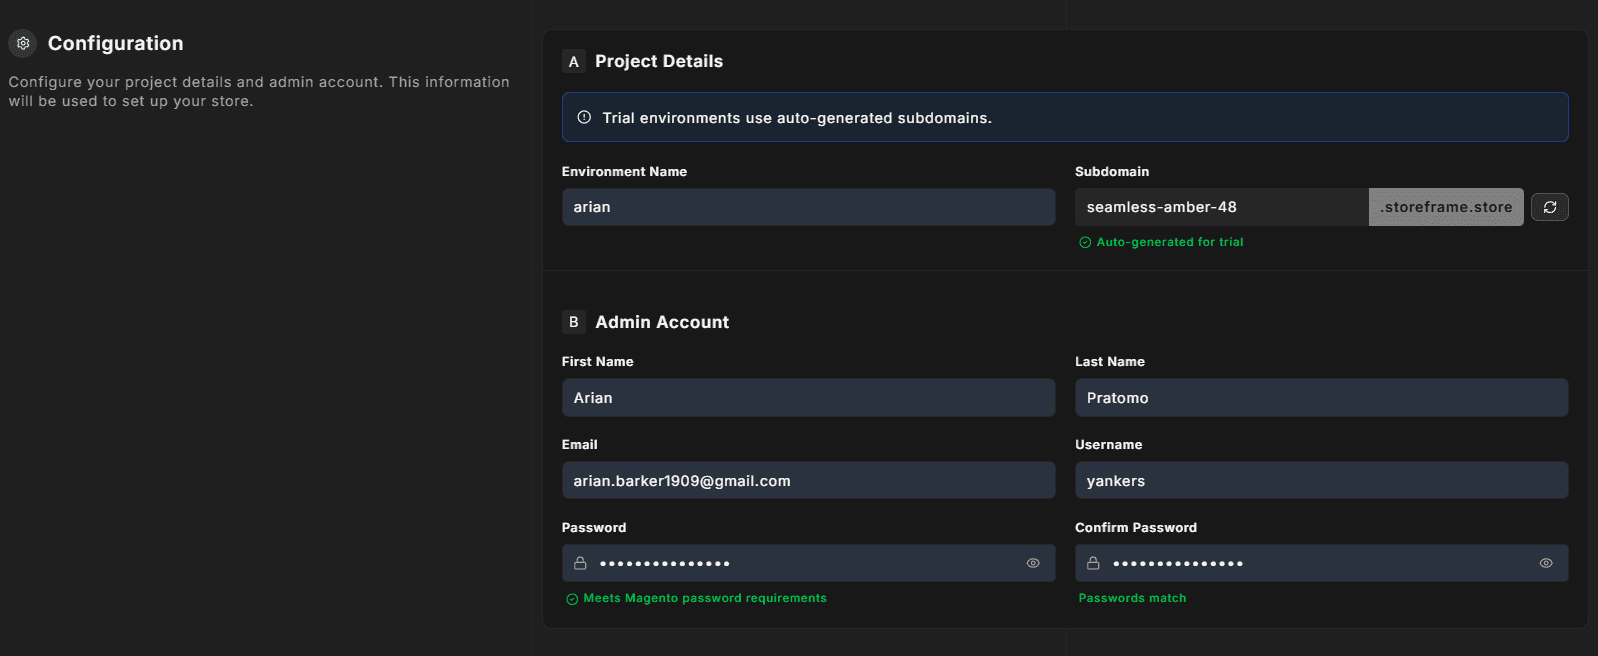
Set the subdomain for your environment URL. For a trial, StoreFrame generates one automatically and lets you regenerate it. For a BYOK Project, you enter your own.
Review
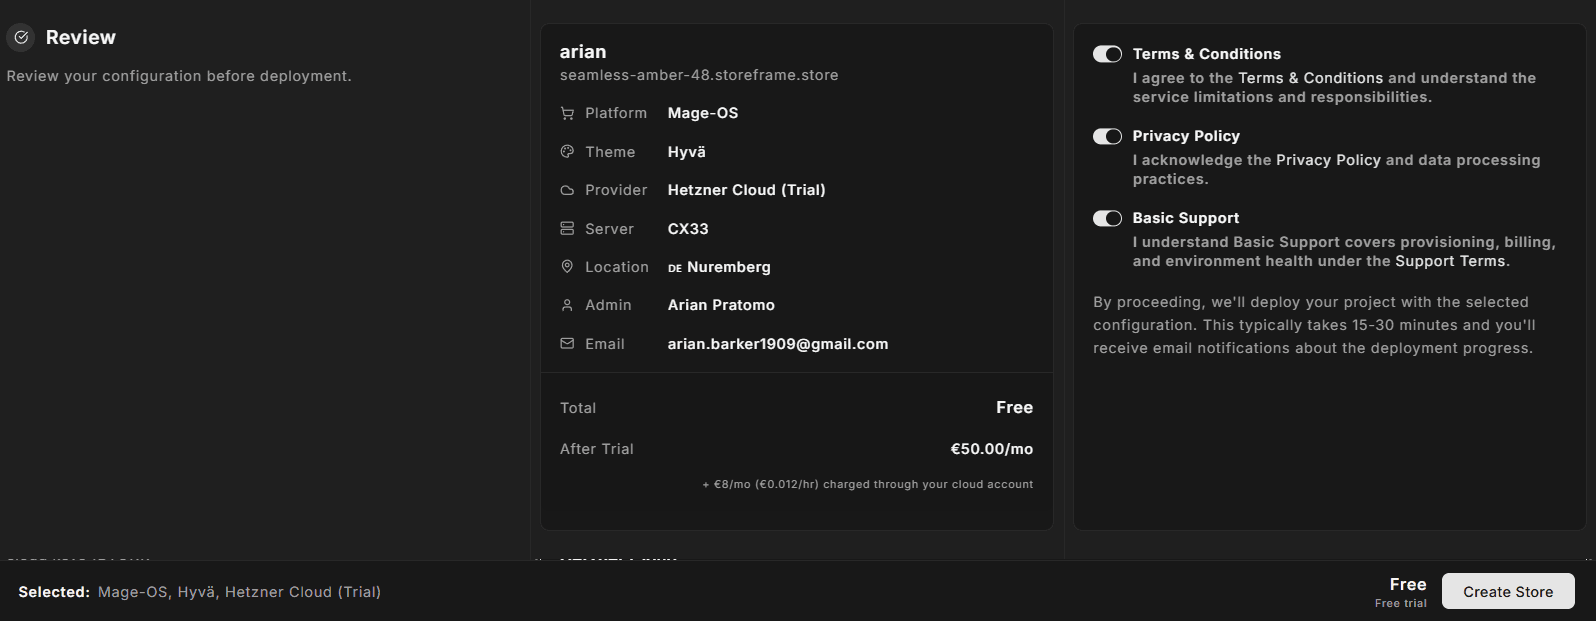
The review section summarizes your full configuration — platform, provider, region, server size, theme, estimated monthly cost (zero for a trial), and the URL your storefront will be reachable at once provisioning completes.
Read through, accept the terms, and click Start provisioning.
What happens next
You are redirected to a provision-detail page that streams real-time status and logs for the running job. Provisioning typically completes in ~30 minutes. You can leave the tab and return — the job runs entirely in the background.
Once the lifecycle status flips to Active, you have a working Magento environment with:
- A reachable storefront URL and Magento admin URL
- SSH access as the
appuser, with sudo for administrative tasks - The Hub console ready to open Claude Code inside the VM
See /docs/hub/environments for a full description of what each tab in the environment panel shows.